Want to collect utility data as part of your own website or app flow? You can embed your UtilityAPI authorization form directly into your onboarding experience using an <iframe>. Here’s how to do it, step by step.
Step 1: Get Your Authorization Form URL
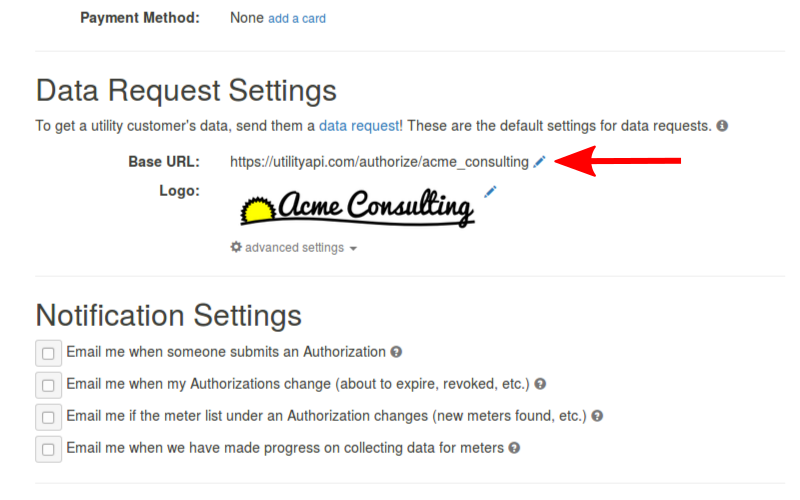
Every UtilityAPI account has a unique authorization form base URL. This is the link you share with customers when asking for access to their utility data — and the one you’ll use in your embedded iframe.
Where to find it:
-
Go to your Dashboard
-
Navigate to Settings > Data Request Settings
-
Copy the Authorization Form Base URL under the Data Request Settings section.
Step 2: Set a Redirect URL
Once your customer completes the authorization form, you’ll want to redirect them back into your app or site.
To do that:
-
Go to Settings > Data Request Settings > Advanced Settings
-
Enter the Redirect URL — this should be a page on your website that can read the referral code (more on that in Step 4)
Step 3: Embed the Form with an <iframe>
Now that you’ve got your URL and redirect in place, it’s time to embed the authorization form.
To do this, you need to add an <iframe> to your website. <iframe> tags are pieces of html code that let you embed other websites into your website. Simply copy the authorization form base URL that you found from Step 1 and put it as the source in an iframe src attribute.
Here’s a basic HTML snippet you can use:
<iframe
    src="https://utilityapi.com/authorize/demo_here"
    style="height: 800px; width: 800px;"></iframe>
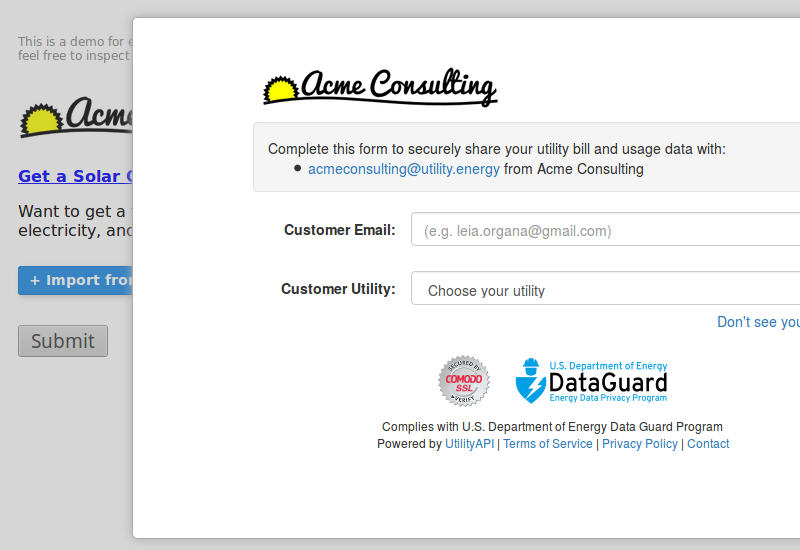
This embeds the authorization form via iframe experience directly into your app or website — so your users never have to leave your flow.
Step 4: Handle the Referral Code
When your customer finishes the authorization form, UtilityAPI creates a referral code and adds it as a URL parameter when redirecting back to your site.
You can use this code to:
-
Manually look up which meters were authorized (see Step 5a)
-
Automatically fetch data from UtilityAPI via API (see Step 5b)
If you’re using an iframe, the redirect happens within the iframe. To access the referral in your main app, use JavaScript’s window.parent.postMessage() to pass the referral code from the iframe to the parent window.
Want to see it in action? Check out our live demo.
Step 5a: Find Authorizations in the Dashboard
To view authorizations manually:
-
Copy the referral code from Step 4
-
Go to your UtilityAPI dashboard
-
Add the referral code as a query parameter in the URL like this: https://dashboard.utilityapi.com/?referral=YOUR_CODE_HERE
Step 5b: Automate Authorization Lookup via API
If you prefer automation, use our API to look up the authorizations linked to a referral code.
Just call: GET /api/v2/authorizations?referrals=YOUR_CODE_HERE
From there, you can fetch meters, bills, and interval data. For full instructions, visit our API Quickstart Guide.
Step 6: Test Your Integration
Before going live, test your embedded form using our demo login credentials. For example:
-
Username:
UAPI_TEST_residential -
Password: Test

Our test scenarios simulate real utility logins and help you make sure your redirect and referral handling logic is working as expected.
You're all set!
Embedding your authorization form keeps your customer experience seamless while giving you the data access you need. If you run into any issues, reach out to our support team.